This one took stupidly long to sort out.
My work, which shall remain unnamed, had a pile of these Dell Latitude E6410’s for years, most of which worked adequately if never particularly well. They were quirky. They were slowly retired in favor of better equipment, and a handful were kept around as “emergency spares” until they got so out of date that they were finally kicked off the domain. They became off network utility machines until my IT folks couldn’t even keep Windows working on them anymore. The last one finally got officially “disposed” and handed to me to see if I can make anything useful for the office out of it, because I seem to be able to keep stuff alive.
Here’s the problem it had – you could get it to run for a few minutes, and then it’d just overheat and switch off. I switched it over to Debian because it’s a little lighter on resources (and we needed a spare linux box anyway), and that did improve things … slightly, for a year or so.
If you search “overheating E6410” on Google, you’ll see a pile of them, with almost no solutions. I did eventually conclude the thermal pads on its heat sink had died, and pulled it apart to replace the pads with decent thermal paste. This got us almost another year of usable performance out of it – the CPU performed well, but the GPU would still overheat if it did anything hard.
Finally, a year ago, it got back to just overheating the GPU after two minutes, and I stuffed it in a drawer until I had time to screw around with it.
I had a use for it this afternoon, and an hour to spare to look it back over, so I went ahead and pulled the heat sink back off to get a look. It’s easy to get to on these – one screw and the bottom cover slides off, two screws to remove the fan, and four to pull the rest of the heat sink. It’s one combined unit for the CPU and GPU:
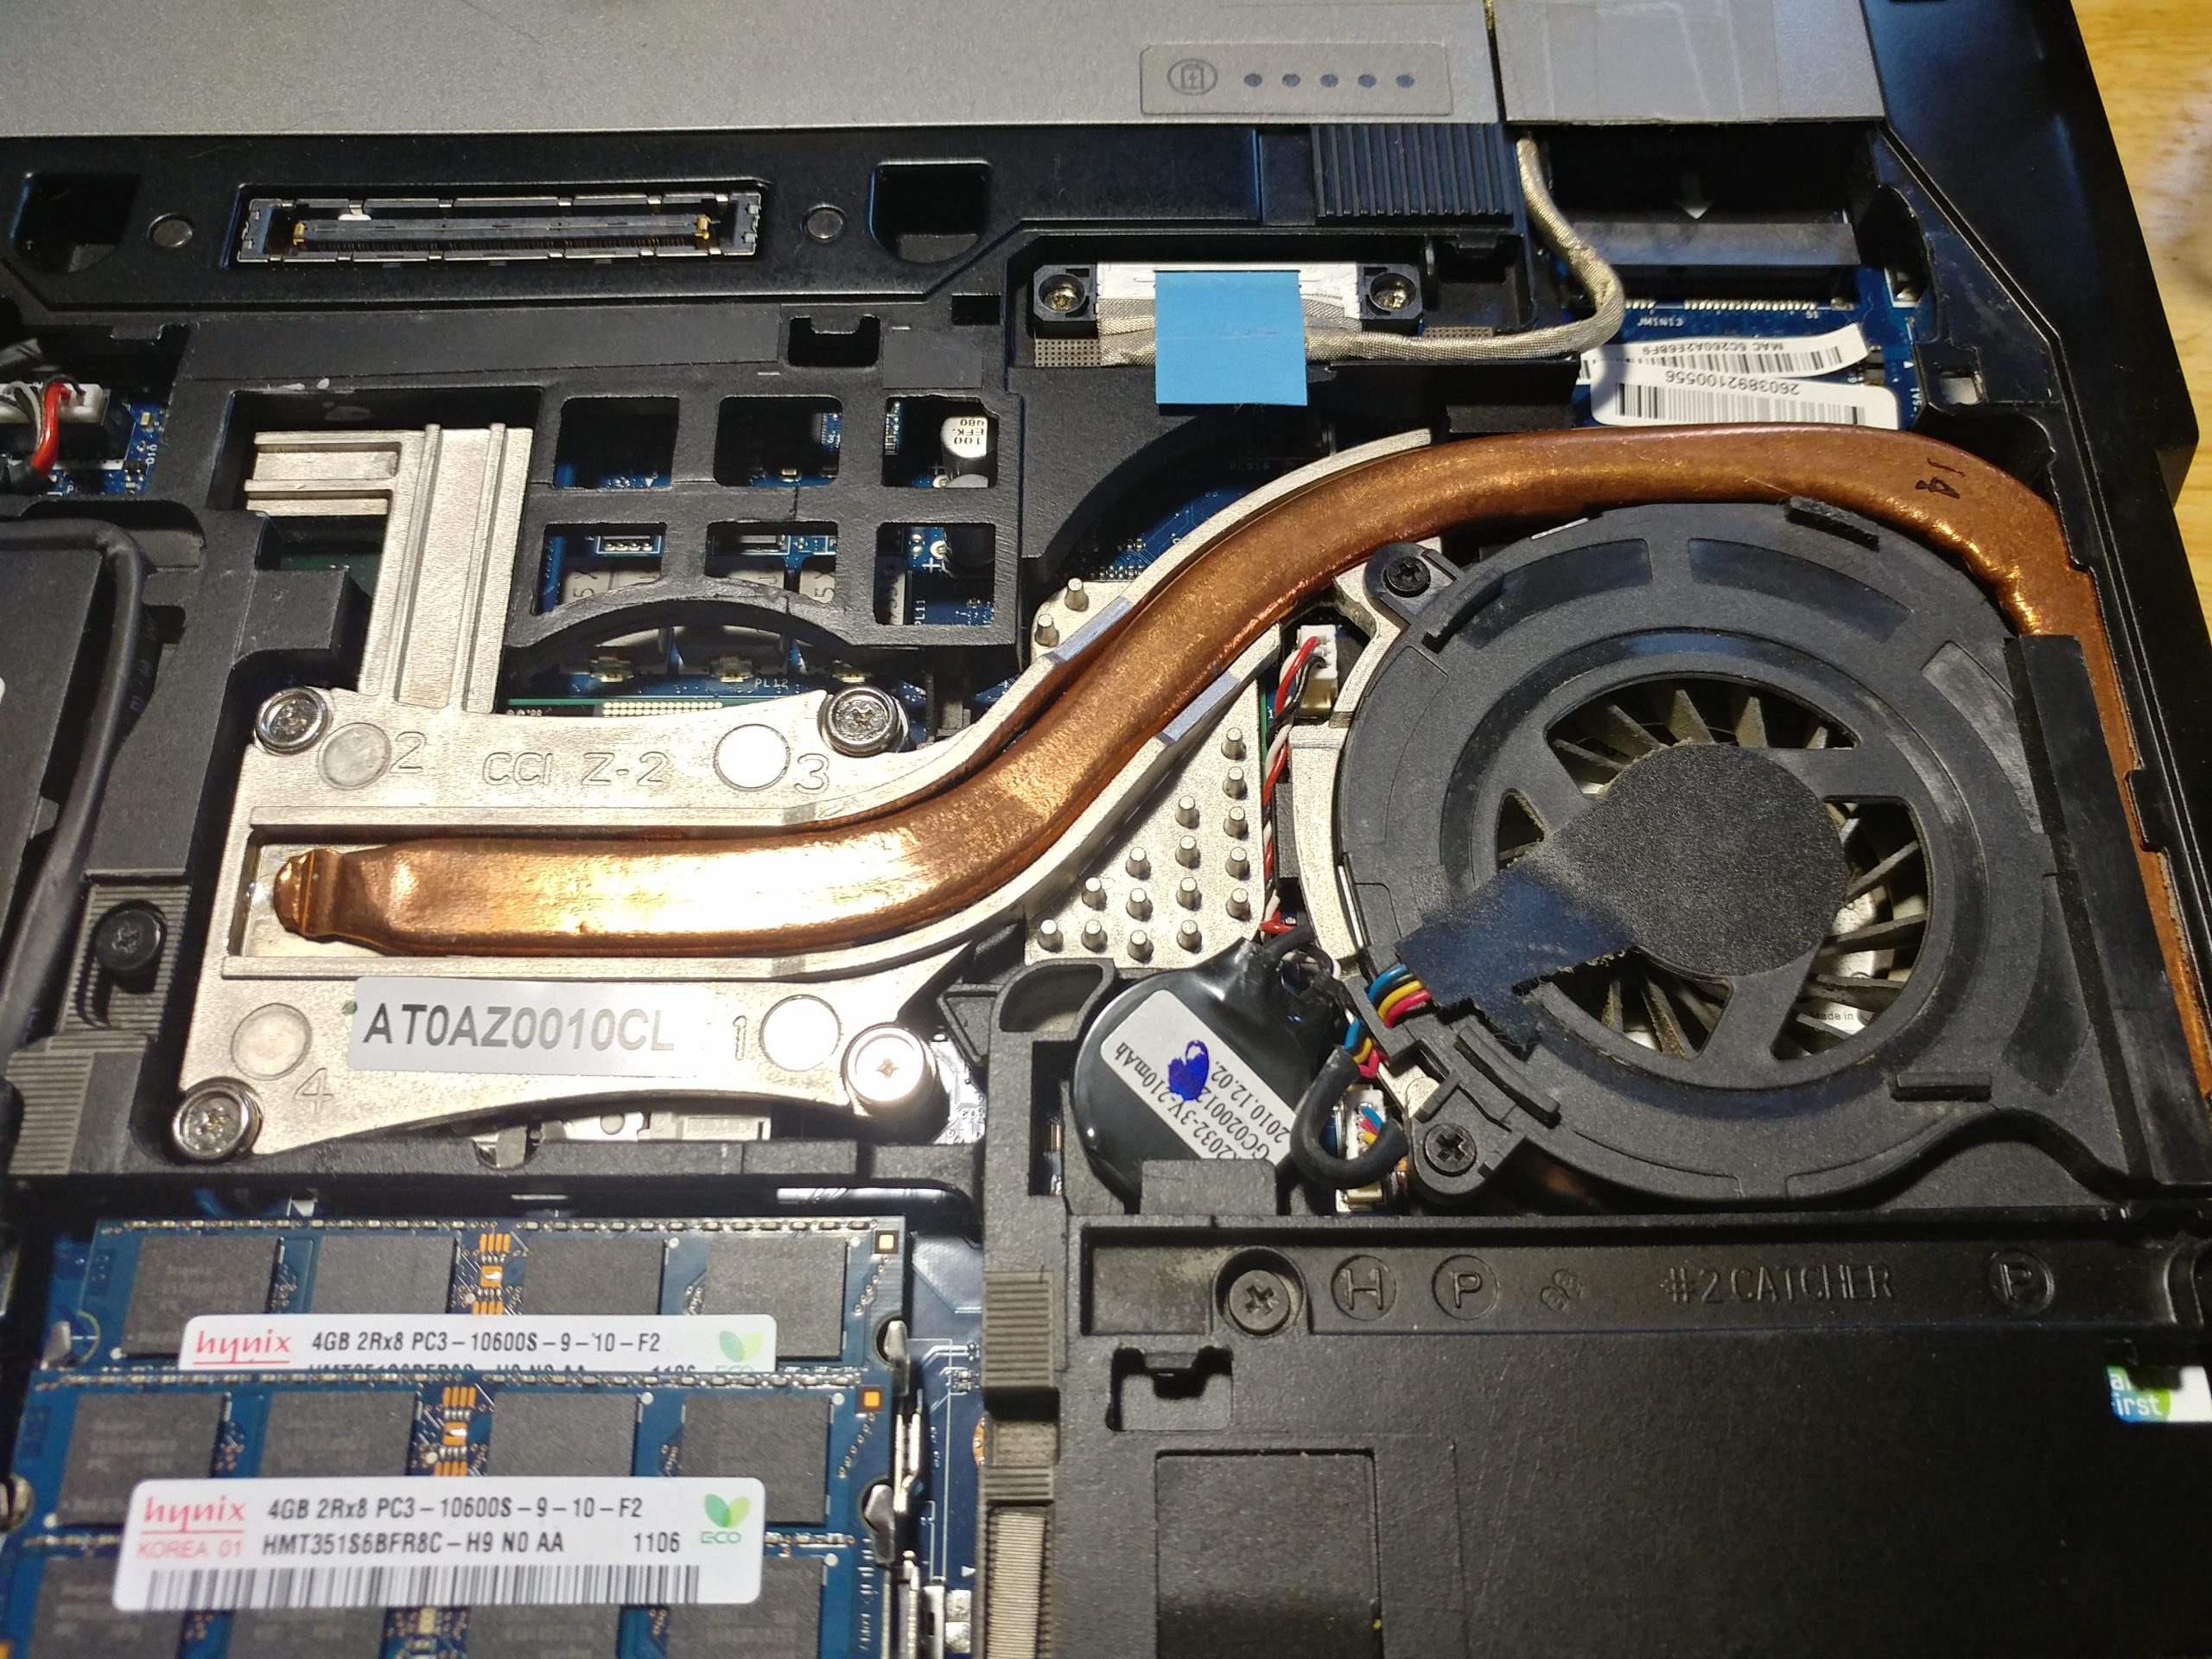
I still had decent thermal paste that hadn’t hardened, and the radiator on the right hand end wasn’t clogged up. I could hear the fan working. But I finally spotted the problem – the GPU wasn’t making very good contact with this oddly shaped heat sink module! The CPU would purr along at 47C, and the GPU would shoot up to 95C and trigger a shutoff within minutes.
Since this machine was already “technically trash” and had one foot in the recycle bin, I said heck with it. The GPU is under the little, studded bit of the aluminum casting, right under where the copper heat bar reverses curvature. I pulled the assembly back out, took it in both hands, and just bent the heat sink bar. I bent it down in the middle as shown, so that with the radiator in its case slot on the right, and the CPU screws mounted, it might have a shot in heck of actually having the heat sink properly contact the GPU.
Turns out that’s all it needed. Now it’s sitting here with the GPU running at 47C as well, and it’s useful again. Not bad for a machine I was about two minutes away from drop kicking toward the recycle bin.
So, if you’ve been wading through the dozens of search results on overheating E6410s, and you’re at your wits end – pull the heat sink off and bend it to get better contact. It’s quick, easy, and you might well save your sanity, too.
Update 2021-03-17: This little machine has now been running for eight days straight, without a single GPU excursion over about 60C that I’ve noticed. This was just bad contact between the GPU and heat sink all along. Heck of a note … but it bodes well for getting a few more years use out of the thing!