Tag Archives: ford

An update on last year’s distributor failures

I thought I’d add in an update on the (hopefully) final resolution of last year’s 300 I6 distributor trouble.  I had one more failure, not long after my last post, and it was a particularly inconvenient one.

On 6/13, the roll pin for the distributor gear fatigued.  Thankfully, it didn’t completely shear, but it did lose a layer on both ends, which means I lost about 20* of timing and all power.  Unfortunately, it did this at 70mph, on a 95*F day, in the left lane, passing a semi on the interstate while pulling a loaded stock trailer, with a truckload of our good working dogs, 130 miles from home.  I can think of less pleasant breakdowns, but not too many.  This represents about 2,000 miles at most on this particular distributor install.

Thankfully, we were only twenty miles from a friend’s farm, and she came to our rescue.  We left our rig and stock at her place overnight, and came back the next day with a couple of spare roll pins and enough tools to replace one roadside.  We carefully limped everything home, and I started doing a postmortem.

My final conclusions on the problem came down to:

  • Never re-use a roll pin in a distributor.  The pin that sheared was the original pin from the Rich Porter.  It may have been low quality to start with.  Use an upgraded new pin every time you pull one out.
  • You can’t get a properly made 300 I6 distributor, remanufactured or aftermarket.  You’re going to need to do some careful re-engineering to reliably use any replacement you get.
  • For the love of all that is holy, if you have a factory distributor that isn’t absolutely FUBAR, don’t replace it!  I’ve never, ever personally had a distributor failure on a Ford that still had it’s factory distributor and where no one has screwed with it.  Maintain or repair as needed, but any replacement you get is likely to be worse than the broken unit you’re pulling.  I have no idea why the original part was swapped out on this engine before I bought it, but I’d wager good money it was because someone was throwing money and parts at a problem that had nothing to do with the distributor.

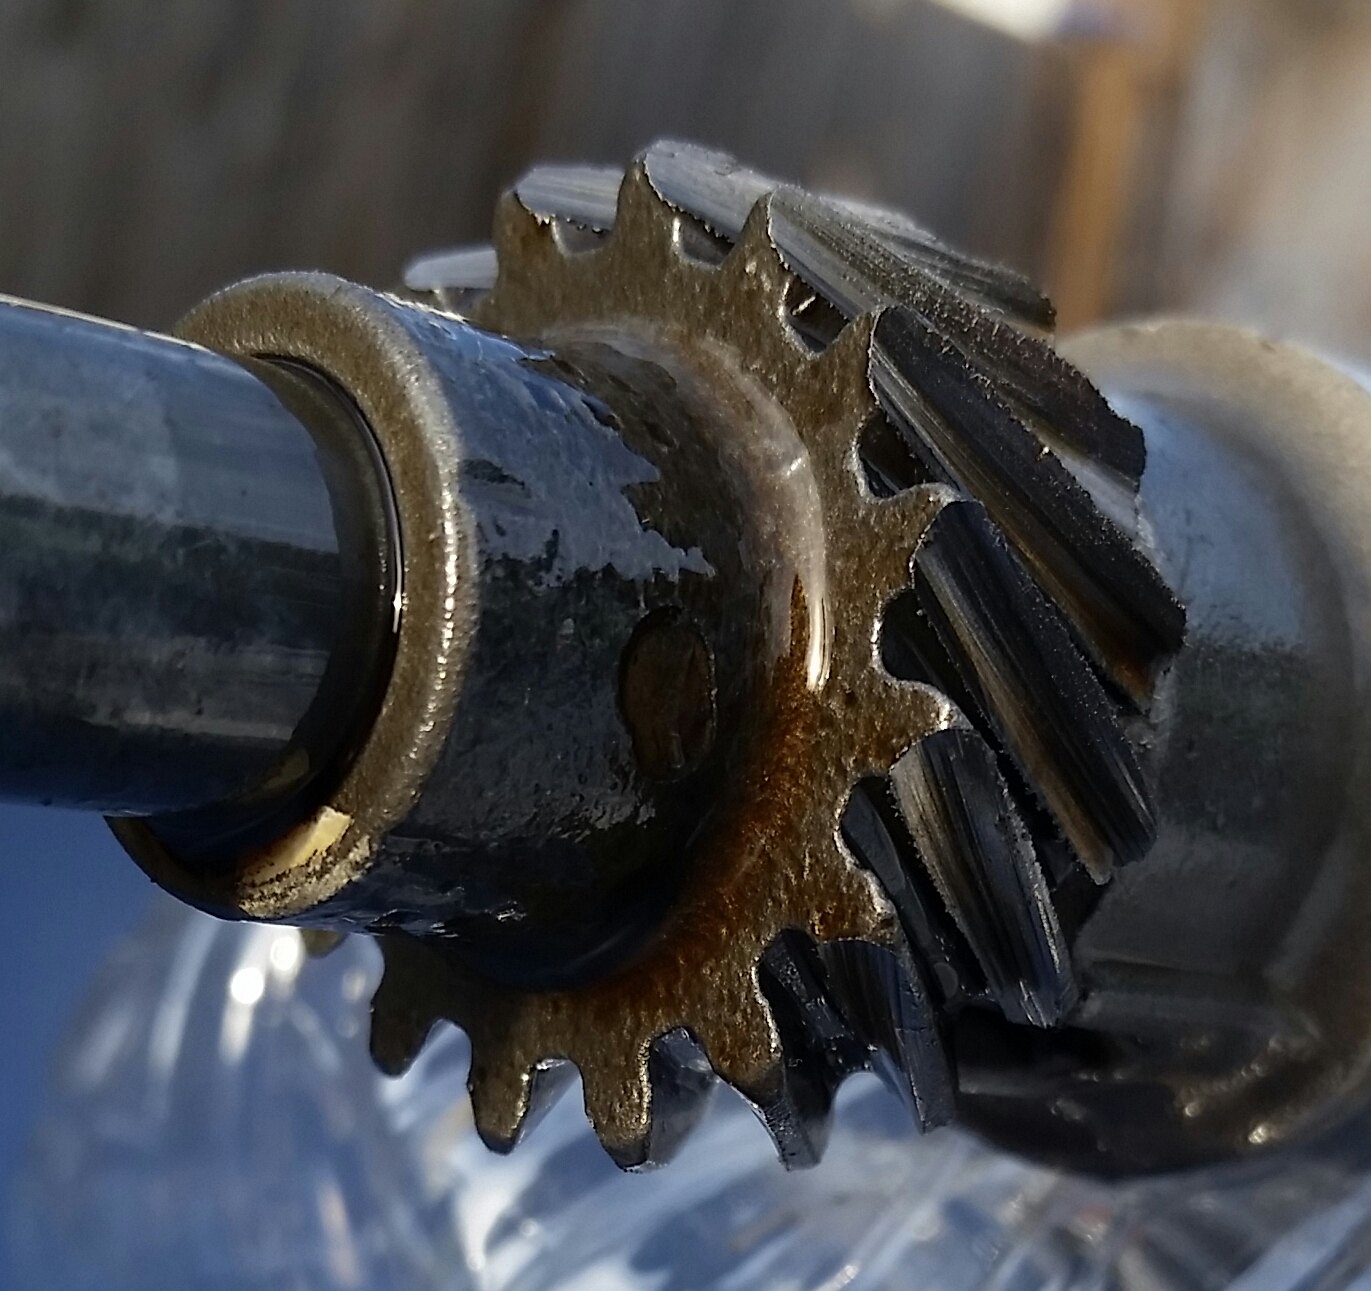
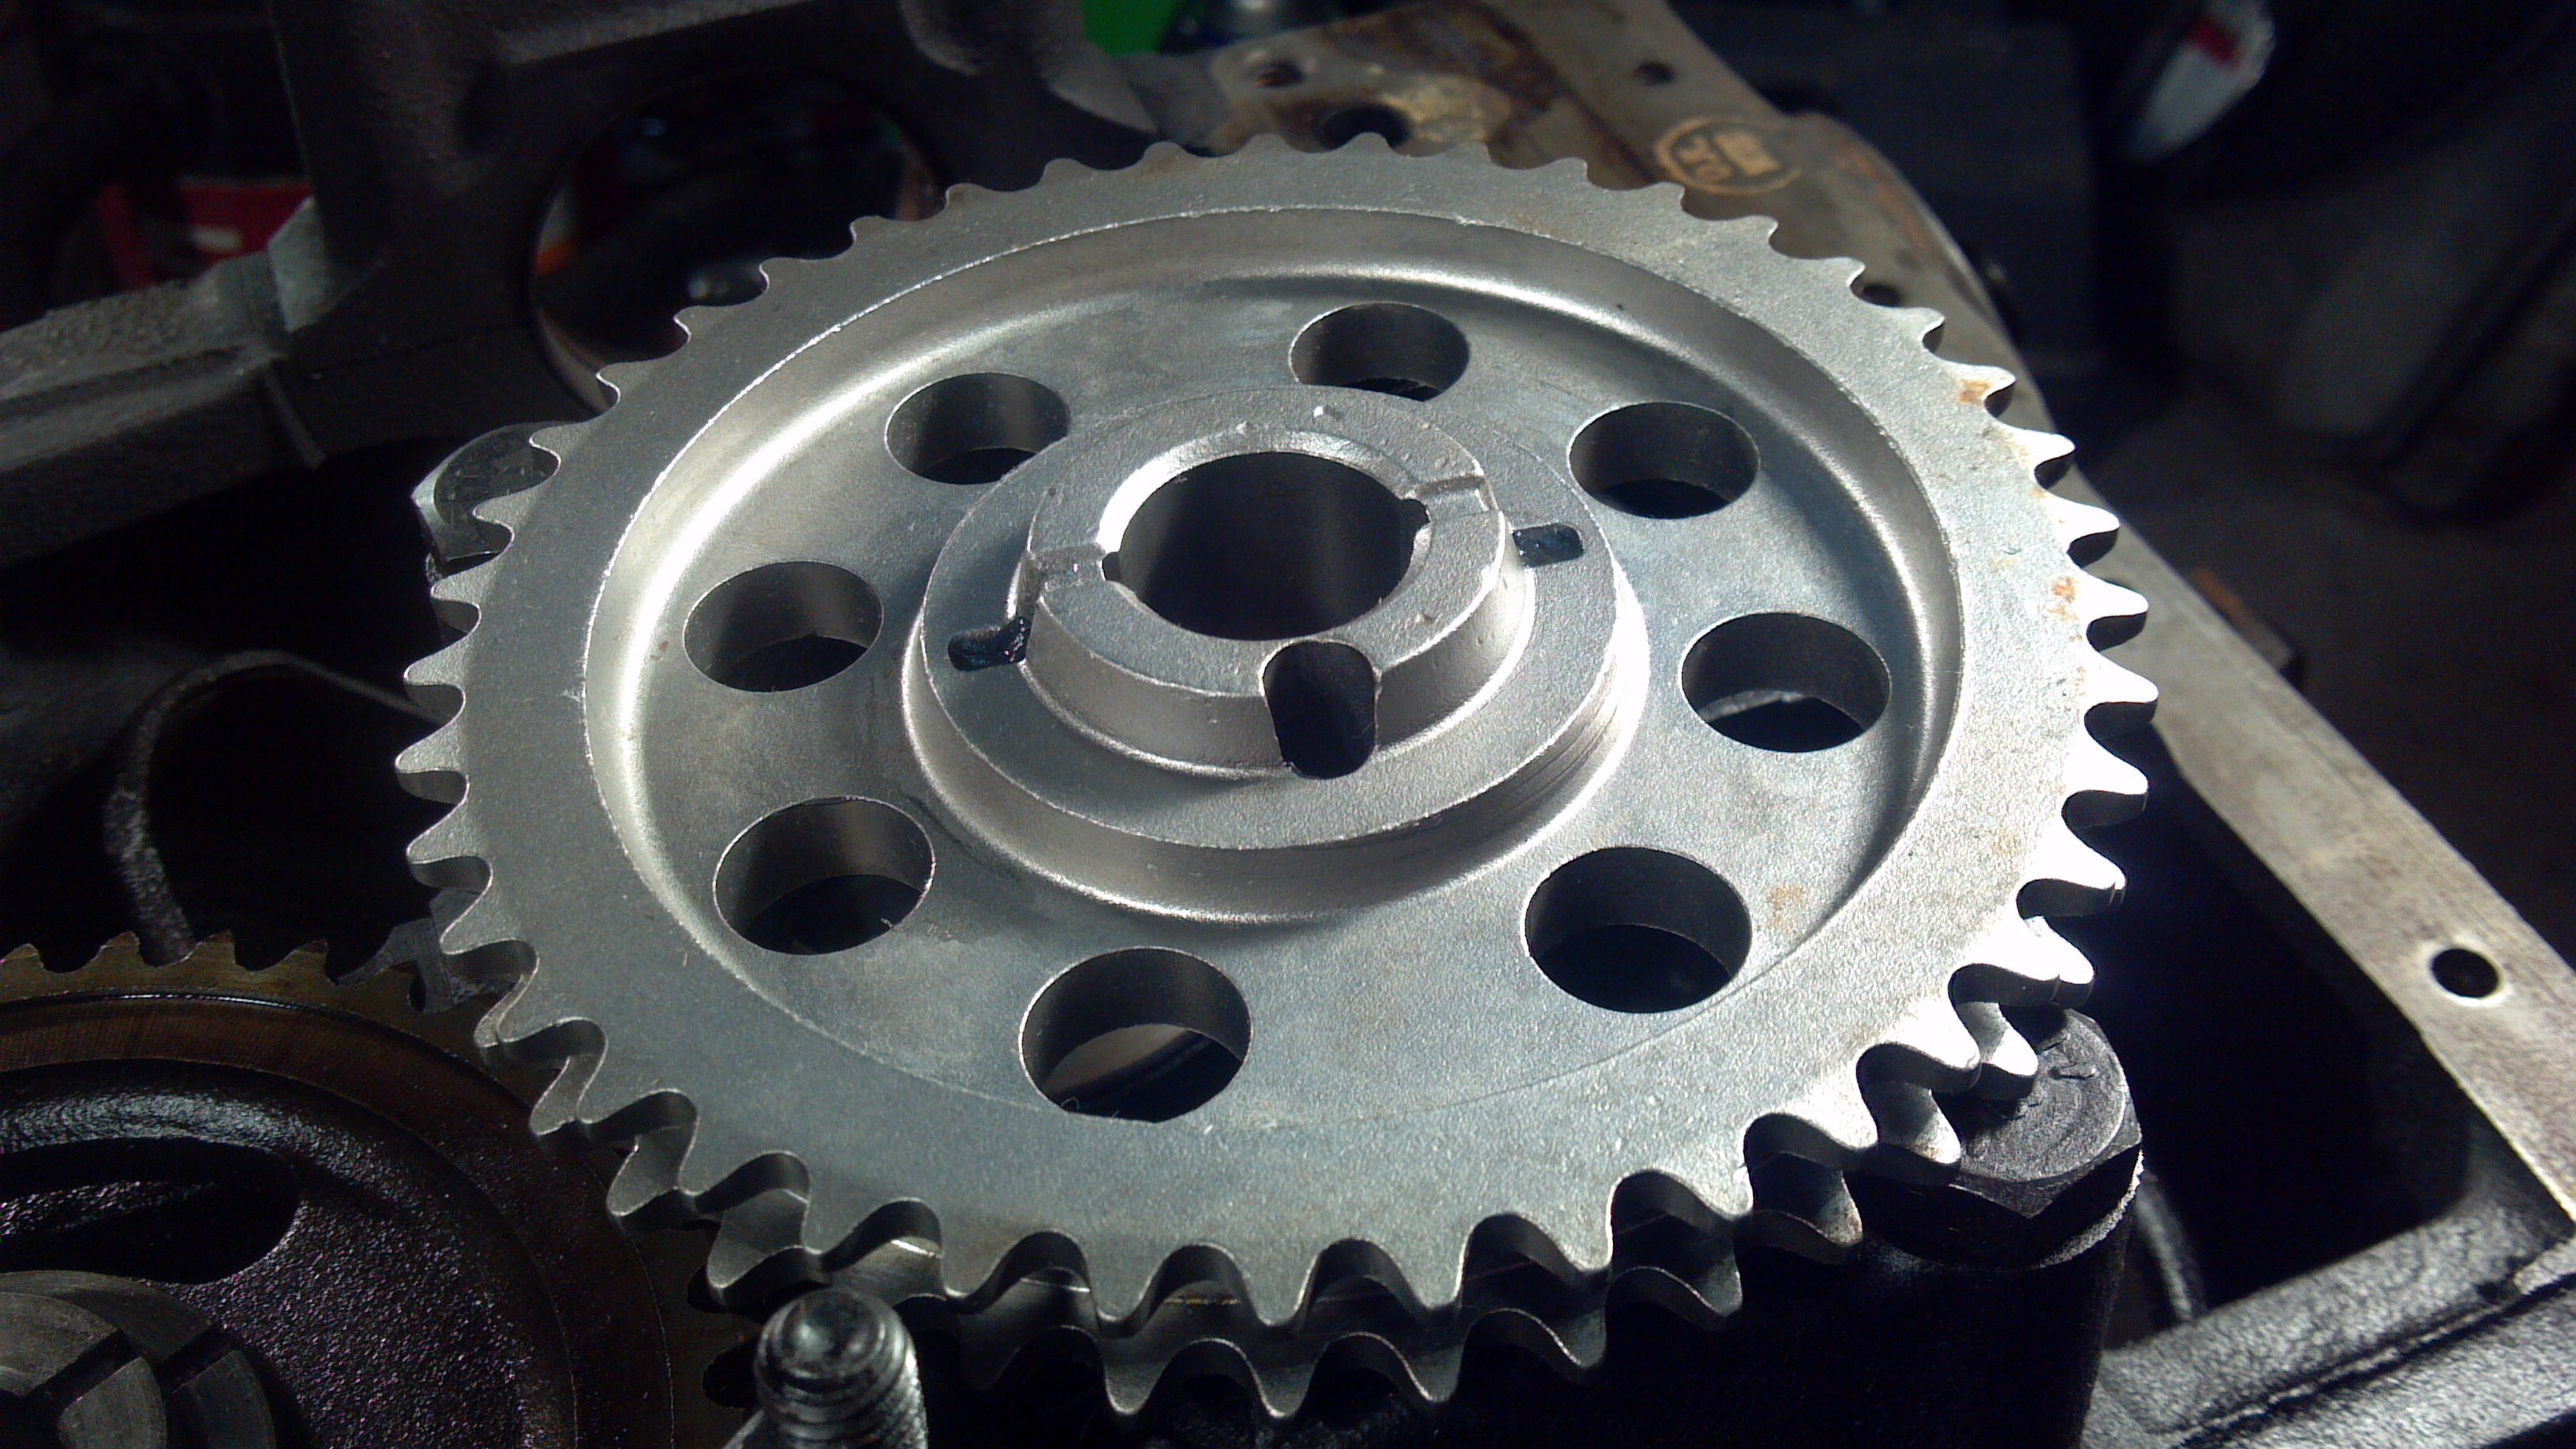
Here’s why your new or reman distributor is most likely to experience roll pin fatigue failures.  The distributor gear should be a press fit on the shaft.  That press fit should be what’s carrying all the load, and the pin should basically be a safety device.

However, the machining on new distributors is crap, and you can almost bet any reman you get will have had a failure which spun the gear on the shaft (my reman NAPA Echlin arrived that way).  Either way, every distributor I’ve put in during this saga has had a distributor gear I could turn on the shaft by hand without the pin installed.  The combo that fatigued on me was the loosest, and when you combine it with re-using the cheap pin that came from the RichPorter, you can see why it died.  In fact, when I re-pinned the NAPA and drove it carefully home, the pin I popped in (which was the original NAPA pin) had already started to fail when I pulled it out that evening – under 150 miles.

My solution to this has so far worked for six months and about 10,000 miles.  First, I bought a 100 pack of brand new, high strength roll pins.  They are about 30% stronger than the standard roll pins of this size, and probably almost double the strength of the off brand pins that came with both the Rich Porter and the NAPA reman.

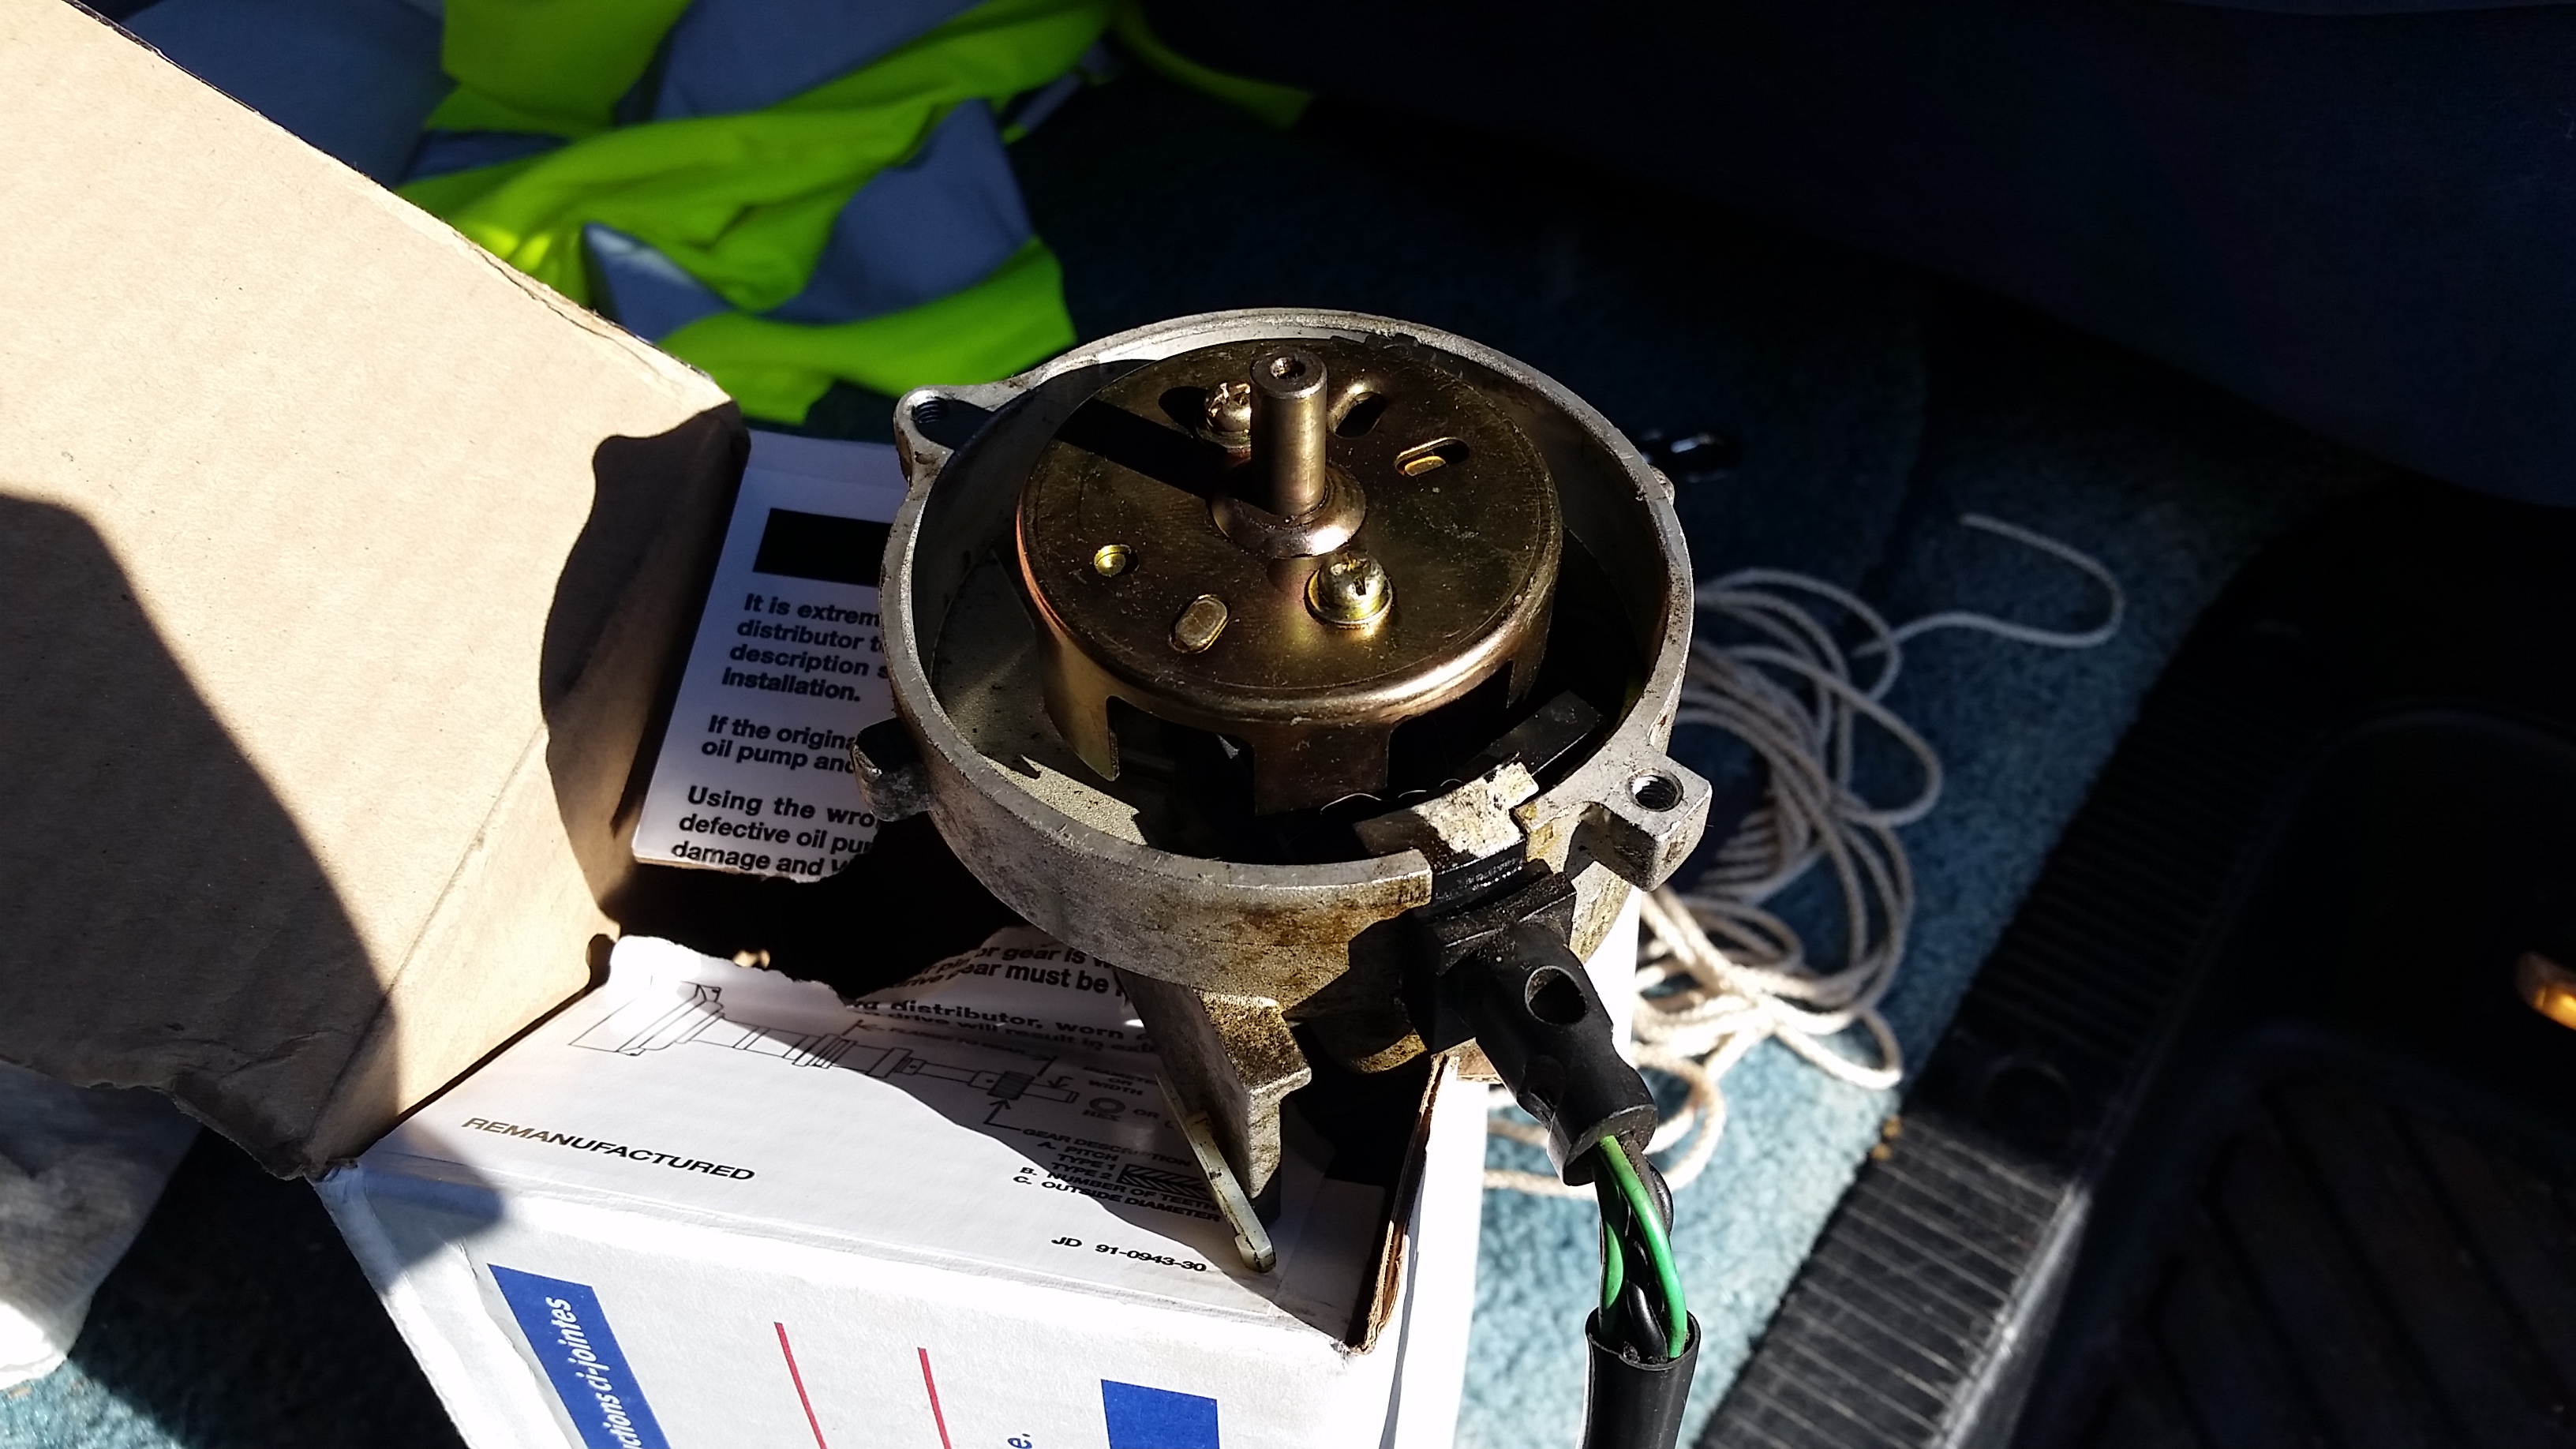
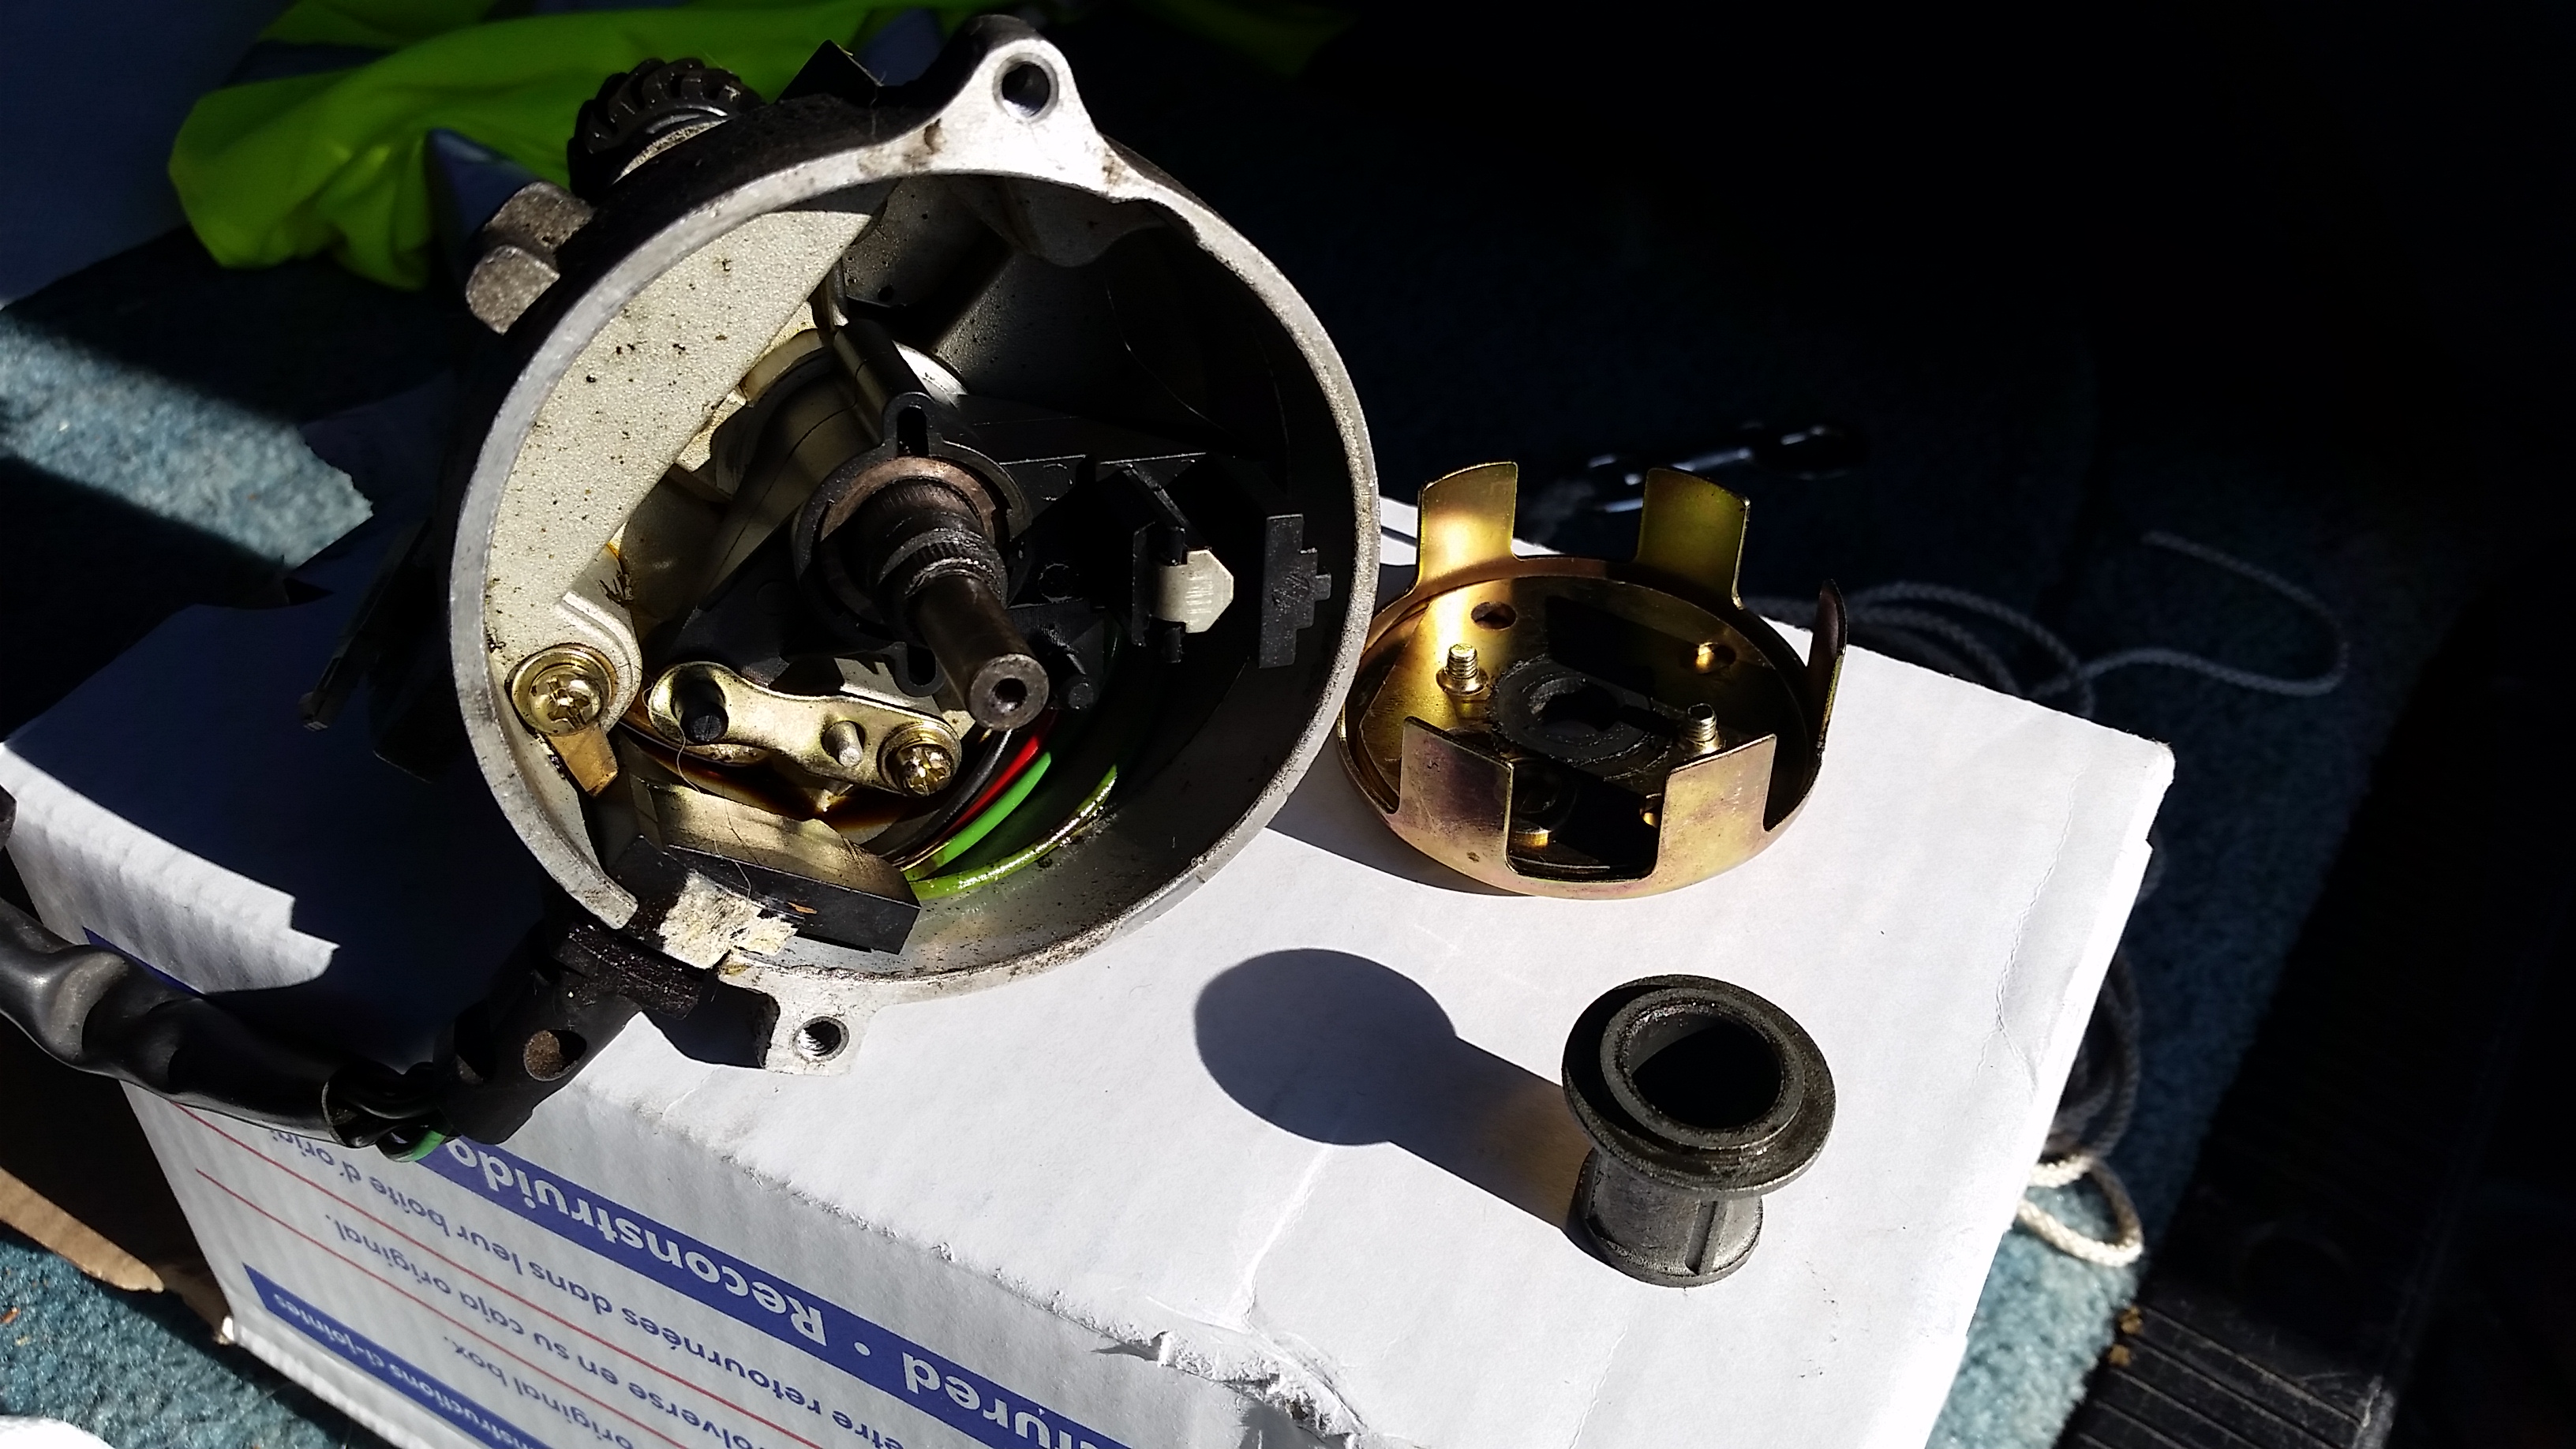
Second, I went ahead and bought a brand new Rich Porter, with the intention of immediately tearing it down.  They are almost the only game in town in terms of new 300 I6 distributors, and if I’m going to start with junk either way, I’d rather it be new junk with a lifetime warranty.  Upon arrival, I immediately pressed out the crappy stock pin, pulled the gear (which was loose, but a lot better than the NAPA unit started out), and removed enough end play shims to get the end play up to 0.030 where I wanted it.  I really didn’t want a repeat performance of the original Rich Porter getting too tight and popping it’s hall plate off the top splines, since that was the only problem I actually had with the original Rich Porter.

After a careful break-in and timing set, that combo has now been in for about 10,000 miles, including plenty more miles on the interstate with the stock trailer.  That means this has also lasted at least 6,000 miles more than any other distributor we’ve had in it since purchase last year.

I was also determined not to get stuck by a failure again if I could help it.  I replaced the already fatiguing “new” pin in the NAPA with a new high strength one, and have that crap distributor and enough tools and spare pins to change and repair it roadside sitting in the van’s toolbox.  I’ve got that routine down to about 20 minutes, which is a lot faster than the tow truck showed up.  I just checked the pin by feel last Friday (the shaft movement feels “soft” when they’re starting to break), and so far it still feels good, with no measurable timing loss with the light either.

I’ve seriously considered selling these nice little pins as singles or small packs on eBay or Amazon.  At $2 a pin plus the cost of a stamp and an envelope, they’re a lot cheaper than the 100 pack I had to buy, and cheaper than the single pins anyone else is selling online (mostly $5 and up).  You can’t get them in quantities less than 100, and I hope to never use up the other 99.  They’re high strength steel and have a minimum double shear break strength of 2,000lb, which means they are good for 44 ft-lb for the distributor gear in a 300 or 351W, or 39 ft-lb in a 302 (smaller shaft).  I’ve got the info on them if anyone wants them, or would probably mail a few for a couple of bucks plus postage.

Here’s hoping this helps someone else out, too.  I’ll update again if I ever get another failure with this.  Meanwhile, I’ve seriously started considering getting my own shafts machined so I can actually get a proper fitment.  Most likely I’ll probably end up swapping in the spare 302 I have instead, though.  The 300 isn’t the best in the world right now with a stock trailer at 70.

Second failed distributor

So far the parts stores are 0 for 2 on good distributors.

Failed distributor drive gear
Another failed distributor! This one a reman.

That’s what’s left of the bronze distributor gear on the NAPA Echlin reman I installed in the last post.  This gear survived around 1,000 miles at most.

On the other hand, a postmortem on the pair of dead distributors, and a review of the Ford documentation on distributor drive gears, has shown me a likely common cause for both failures.

Ford indicates in the linked document that “very little or no shaft endplay… has been found with new and remanufactured distributors. Improper endplay may force the gear against the support in the block or hold it up off the support, causing damage.”

Before I began the repair, I checked the distributor shaft end play on both the NAPA with the failed gear, and the Rich Porter with the failed rotor plate (after pressing it back on).  Both were in the neighborhood of 0.010″ to 0.012″, which is substantially less than the 0.024″ to 0.035″ called for by Ford.

The distributor is a steel shaft in an aluminum housing.  As the assembly heats up, the aluminum grows more than the steel shaft, and the end play measurement decreases.  If you have too little end play, the end result can be that your clearance goes to zero, trapping the housing between the rotor plate and the drive gear.  This could easily either press the rotor plate off its splines, or in the case of the NAPA unit, put so much load on the softer drive gear that it wore out almost immediately.

I needed a rapid fix, and swapped the perfectly good steel gear from the failed Rich Porter onto the NAPA distributor.  Since I had to re-drill the roll pin hole in the process anyway, it let me set my own clearance, and set it properly.  I set the clearance to 0.032″, and so far I’ve had zero issues since the repair (approximately 1000 miles).

As the NAPA gear wore, it manifested in progressive loss of base timing as the teeth wore away.  When I sorted out the cause of the problem I was having (misfire, loss of power and fuel economy), I measured a loss of 6º of base timing on the #1 cylinder.  However, #1 was one of the least worn teeth, visible at the bottom in the photo.  Based on the wear in the other teeth and the difference in rotational play with the distributor still installed, I was losing at least 10º on the #6 cylinder, where I was seeing the most misfires.

Currently, after a timing re-check yesterday, I’ve lost less than 1º of timing since I set it after breaking the gear back in.  Actually, I’d say zero, but my timing light just isn’t that accurate.

As a note on the Ford 300 inline six, there’s very little drawback to setting your distributor shaft end play high.  Unlike the V8 engines, the distributor rotates clockwise from the top, and as you can see from the wear on the gear, that means the gear rides up on the plain bearing surface at the bottom of the distributor housing, not on the gear support block inside the engine block.  Because of the load of the oil pump, the gear will stay up against the housing steady as the engine is running, so you won’t have a timing variation.  A bit more end play just puts your rotor a tiny bit higher in the cap – nowhere near enough to cause an interference.

Failed TFI aftermarket distributor

I experienced a new-to-me form of failure a week or so before Christmas, and thought I’d share the details, since even a pretty detailed Google hunt failed to turn up any other account of this problem.

The vehicle is a 1996 Ford Econoline with a 300 I-6. After driving around perfectly for an hour, it suddenly lost most of its power mid-drive, running smoothly but unable to exceed about 10mph. Manual shifting of the C6 proved we still had both first and second, and it still started acceptably (if weak), with no sign of engine shakes or cylinder misfires. A quick roadside diagnosis showed no new codes, nothing out of the ordinary in the OBD II data stream, and a look at the distributor indicated it was still tight and hadn’t shifted from the previous owner’s paint mark (which was correct, I’d checked timing in November after purchasing it).

After a tow home, I began diagnosis. After eliminating some of the other basics, I got the timing light out, and found it was running with a base timing of about 20* ATDC. Loosening the distributor hold down and twisting in about 30* more timing immediately removed the symptoms. Then, it was time to find the cause.

With a loose hold down bolt ruled out, the usual suspects would be the timing set, the distributor gear at the cam, or the shear pin that holds the gear to the distributor shaft. A dead timing set or stripped distributor gear usually mean no start, not timing slipped. I suspected the shear pin might have went, with the gear just tight enough on the shaft to have “stuck” after losing some timing.

I pulled the cap and rotor, and everything looked normal at first glance. Here’s a shot after having pulled the distributor.

Richporter TFI distributor
This is the failed distributor, which looks innocuous with the shutter wheel still on the shaft.

However, once I grasped the shutter wheel and gave it a bit of light torque, I immediately felt a “notchy” click, and was able to rotate it.  The possibility of a magic “half-stripped” distributor gear went briefly through my head, but it didn’t take long to realize the distributor shaft wasn’t turning at all.  In fact, the shutter wheel popped right off in my hand.

Failed distributor
This shot shows the failed component. Notice the stripped splines where the TFI shutter wheel should press onto the shaft.

At that point, it was obvious what had happened, though I still can’t point to why.

I pulled the distributor, verified the gear and shear pin were in fact fine, and popped in a NAPA reman, which was the only thing I could get locally that day.  The failed unit was a Richporter Technologies, and the NAPA is a reman Motorcraft.

I still have no clue why the original distributor was replaced by the previous owner – I’ve never had an original actually fail, and this engine has pretty low mileage for a 300.  I’m guessing his mechanic swapped it in when they were trying to hunt down a SPOUT circuit error, which I suspect is part of why I got this van so cheap.  That was something simple I fixed five minutes after we bought it – a slightly loose terminal at the back of the SPOUT connector.  Haven’t had a single real issue with it other than the SPOUT issue and the newly failed aftermarket distributor.

Machining differential carriers for the Ford IRS

Using a non-IRS limited slip in a 7.5 or 8.8 Ford IRS axle requires the builder to choose between leaving out the axle retainer clips, or machining the differential side gears to accept them.

For those who want to keep their retainer clips, I’ve come by the following diagram for machining the side gears:

Machine work diagram
Machining Differential Side Gears for the Ford 7.5 and 8.8 IRS

I originally found this drawing on TCCOA in a post here, courtesy of 392Bird.  No idea where it originally came from.

The side gear in the drawing is straight cut, unlike the gears used in the Trac-Loc, but that doesn’t really matter.  What’s important here is the bevel machined between the inboard side of the splines and the gear face for the c-clip.  This bevel will allow your IRS retainer clip to compress, so that you can remove the half shaft without having to disassemble the center section to compress the clip.

Measure twice, cut once

This is an example of why you always check your assembly tolerances as you’re putting an engine together.  The image that follows is the cam sprocket from an Edelbrock 7814 set I purchased last week.

Defective cam gear
Defective Edelbrock 7814 cam sprocket

Can you spot what’s wrong already?  If you can’t see it in the view above, click the link to the full resolution of the photo.

Ford uses a simple system to control camshaft end play.  The sprocket face above bolts to the end of the front cam bearing journal, creating a gap between the second step on that sprocket and the journal face.  Sandwiched in that gap is a hardened steel or cast iron camshaft retainer plate.  The difference in thickness between the gap and the plate thickness ends up being the end play.

When putting together an engine, my normal procedure is to install the cam, bolt up the cam sprocket temporarily so that I can check end play while it’s easy to get to, and then remove the cam sprocket and proceed to the crank and the rest of the rotating assembly.

Since I always measure and remove anyway, I didn’t pay too much attention to the new cam sprocket when I was installing it last night, which gave me ZERO end play once installed.  The cam would turn by hand, but I was probably less than a thousandth of an inch of luck from full bind.  Of course, running the engine in this state probably would have lunched the build very quickly, which is why it’s best to measure everything as it goes together.

I was re-using the original cam with a new camshaft retainer plate, so my first thought was a machining error in the Ford plate.  I swapped to the old Ford retainer plate and got the exact same result.

I’d have saved myself about ten minutes of head scratching if I’d looked at the sprocket first.  If you look at the two protruding faces, neither is machined.  They are both as-cast surfaces.  You can see a bit of the hub of the original sprocket in the bottom left of the photo, for a comparison of what that finish should look like.  Or, just take a quick peek below.

Simply put, someone at the factory making this part for Edelbrock just missed a step.  At some point during manufacture of this piece, it should be chucked in a lathe, and those two surfaces turned to meet the end play tolerance.  Someone just missed it.  This surprised me, since it’s the only defective part I’ve ever personally gotten from Edelbrock.

Luckily, a phone call quick trip to Advance the this morning before work got me a part that was completed.  I’d bought their only 7814 in the region, so I paid another $12 and swapped to an Edelbrock 7811, which is interchangeable with the 7814 other than a pair of extra keyways to advance and retard the cam timing.  Problem solved, no hassle, and my one Edelbrock “oops” will go back to them.

Here’s the 7811 with the correct machining.  You can see there are four lathed surfaces here that were missed on the first one.

Edelbrock 7811 sprocket
Edelbrock 7811 cam sprocket

A Note on Measuring Camshaft End Play

I’ve noticed a very common and very critical omission in most of my shop manuals that turns up on forums fairly often.  Off the top of my head, this tidbit is missing in two Ford factory shop manuals I own (1993 Mustang and 1991 Truck), as well as a smattering of Haynes and other manuals I have.

All of these references instruct you to install the cam, install the retainer plate, check the camshaft end play (the tolerance is 0.0055-0.009 for fuel injected 302’s), and then install the timing set.

If you follow these instructions as they appear in every manual out there, you will do a lot of head scratching, because you’ll see anywhere from 1/10 to 1/4 of an inch of camshaft end play.  Don’t worry!

How to measure camshaft end play (the one and only way that actually works):

  • Install camshaft
  • Install retainer plate
  • Install and torque cam sprocket
  • Measure end play
  • Remove sprocket so that you can install remainder of timing set

Without the sprocket installed, the only thing controlling your end play is the plug in the camshaft bore all the way in the back of the block.  The sprocket must be installed in order to measure, but I have yet to find a manual that points that fact out, at least in my collection.

This little anecdote is personal experience, as I was one of the head scratchers the first time I ran into this.

Ford Duraspark wiring diagram

Duraspark wiring
Ford Duraspark Ignition wiring diagram

Here’s another useful tidbit out of my archives, source unknown.  Have a 60’s daily driver or cruiser, and want to eliminate points maintenance for very little cost, with easy to find, reliable parts?  Install a Duraspark II system.

I won’t repeat the many good guides on installing the system.  There’s plenty of information already handy on the web.  This early wiring diagram is handy, though, and one of the clearest I’ve seen.

5.0 Cam Specs

Ford 5.0L cam specs
Ford 5.0L (302) Cam Specs, 1985-1995

This scan has been floating around the internet for a while, and I honestly can’t remember where I found it.  It’s a scan from a Ford publication showing the selection of cams used in the 302 from 1985 to 1995.   Unfortunately it’s incomplete.  However, I’ve found that accurate factory cam data and specifications are actually pretty hard to come by, so I tend to collect this info when I can get it.

Enjoy!  Oh, and if you find more, or recognize the original source document – please let me know!